Quick Answer
Your iPhone 18 Pro Max photos can look worse with a filter when it reduces useful light, adds unwanted reflections or creates an effect you did not want.
A camera filter does not automatically increase sharpness, resolution or sensor performance.
Use CPL for suitable reflections, ND for exposure control at your chosen settings, and Black Mist for intentional softness and glowing highlights.
If the scene has no problem a filter can solve, shooting without one may give you a cleaner result.
Do iPhone camera filters actually improve image quality?
They can improve the photograph you want to create. They do not upgrade the camera hardware. This guide covers physical filters placed over the cameras, rather than color presets inside an app.
More visible detail is different from more resolution
A CPL may make objects beneath water reflections easier to see. It reveals information that glare was obscuring; it does not add megapixels or make every part of the image sharper.
Creative control can involve a deliberate trade-off
A longer exposure can turn moving water into a smooth texture. A mist filter can make a night portrait feel softer. Those results may suit your idea even though they contain less crisp motion or contrast.
ZEERA’s recommendation: decide what you want to change before choosing a filter. Start with the reflection, exposure or mood you need to control, rather than the assumption that extra glass means a better photo.
Why do my iPhone 18 Pro Max photos look worse with a filter?
1. You are losing light when you need it most
ND and CPL filters reduce the light reaching the camera. Indoors or after sunset, automatic exposure may compensate with a longer exposure or higher ISO. That can mean motion blur or noisier shadows; Apple’s ISO documentation confirms that higher ISO values produce noisier images.
Try this: remove an unnecessary ND or detachable CPL and repeat the shot. Stabilizing the phone helps camera shake, but cannot freeze a moving person.
2. The filter effect conflicts with your subject
Black Mist is designed to soften highlights and add glow. If you want crisp product lettering, a detailed document or a clean architectural photo, the effect can look like unwanted haze.
3. Your CPL is at the wrong angle
Polarization changes with the filter’s rotation, the camera position and the light. An angle that helped a lake photo may do little for the next scene. It may also remove a reflection you actually wanted to keep.
Try this: rotate slowly while watching the reflection itself. Stop at the most useful result, rather than always choosing the strongest effect.
4. Extra optical surfaces are catching bright lights
A filter can introduce additional reflections or ghosting when a strong light shines toward the lens. A CPL controlling window glare is not the same as a cure for every flare spot around the sun or a streetlight.
For that distinction, see our iPhone camera glare and lens flare guide.
5. Dirt, stacking or poor fit is degrading the image
Fingerprints, condensation, scratches and a misaligned mount can make a photo look soft or hazy. Stacking unnecessary filters adds optical surfaces and can darken frame corners. Clean the original lenses and both sides of the filter, and check fit before blaming the camera.
6. Auto exposure is hiding the change you expected
Adding ND does not guarantee a darker finished photo. The camera may compensate automatically. You may get similar brightness with a different shutter speed or ISO, so judge motion, detail and noise as well as exposure.
An added protective layer also deserves the same optical checks. Our guide to whether iPhone lens protectors affect photo quality explains what to inspect.
Which filter should I use for each shooting problem?
CPL: control reflections on water, glass and glossy surfaces
Use a circular polarizing filter when a reflection distracts from your subject: glare on a lake, your reflection in a shop window, or shine on wet leaves. Rotate it and change your shooting angle if needed.
The effect depends on the surface and lighting. Do not expect it to eliminate bare-metal reflections or every reflection at every angle. Sky darkening can also look uneven across a very wide view.
Skip it when: the reflection is part of the composition, the effect is negligible, or low light makes the light loss more costly than the benefit.
ND: control exposure for a chosen shutter speed
Use neutral density when there is too much light for the exposure settings you want. Examples include daylight video with deliberate motion blur or a supported long-exposure workflow for flowing water.
For video, 30 fps with about 1/60-second shutter is a common creative starting point, not a compulsory rule. Use an app that supports manual shutter and ISO control, then select ND strength to suit the light.
Bright sunshine alone does not make ND necessary. For an ordinary still photo, the phone may already handle brightness with a faster exposure. Unnecessary ND can work against sharp handheld shots.
ND darkens the whole frame. It does not soften the sun’s lighting, selectively fix a bright sky, or expand the sensor’s dynamic range.
Black Mist: add softness and glowing highlights
Use a diffusion filter when you want atmosphere: softer portrait rendering, glowing practical lights or a gentler video look. Softer highlights and reduced contrast are part of the effect.
Skip it when: you want maximum crispness, accurate product texture or a clean view of fine text. You cannot reliably remove an optical glow after capture.
UV: add a protective optical layer
Treat UV primarily as protection in this iPhone workflow. It is not a sharpening filter, a low-light upgrade or a substitute for CPL reflection control. Keep it clean and compare against a bare-lens shot if unexplained haze appears.
No filter: preserve a clean baseline
For dim interiors, moving children, documents or scenes without unwanted reflections, no filter can be the sensible choice. Choosing to leave a filter off is part of using filters well.
For a broader buying overview, read CPL vs ND vs Black Mist for iPhone photography.
Which ZEERA filter system fits the way I shoot?
These two systems serve different workflows. Choose the one whose controls match the scenes you photograph.
ZEERA SnapLens Trio: integrated CPL control
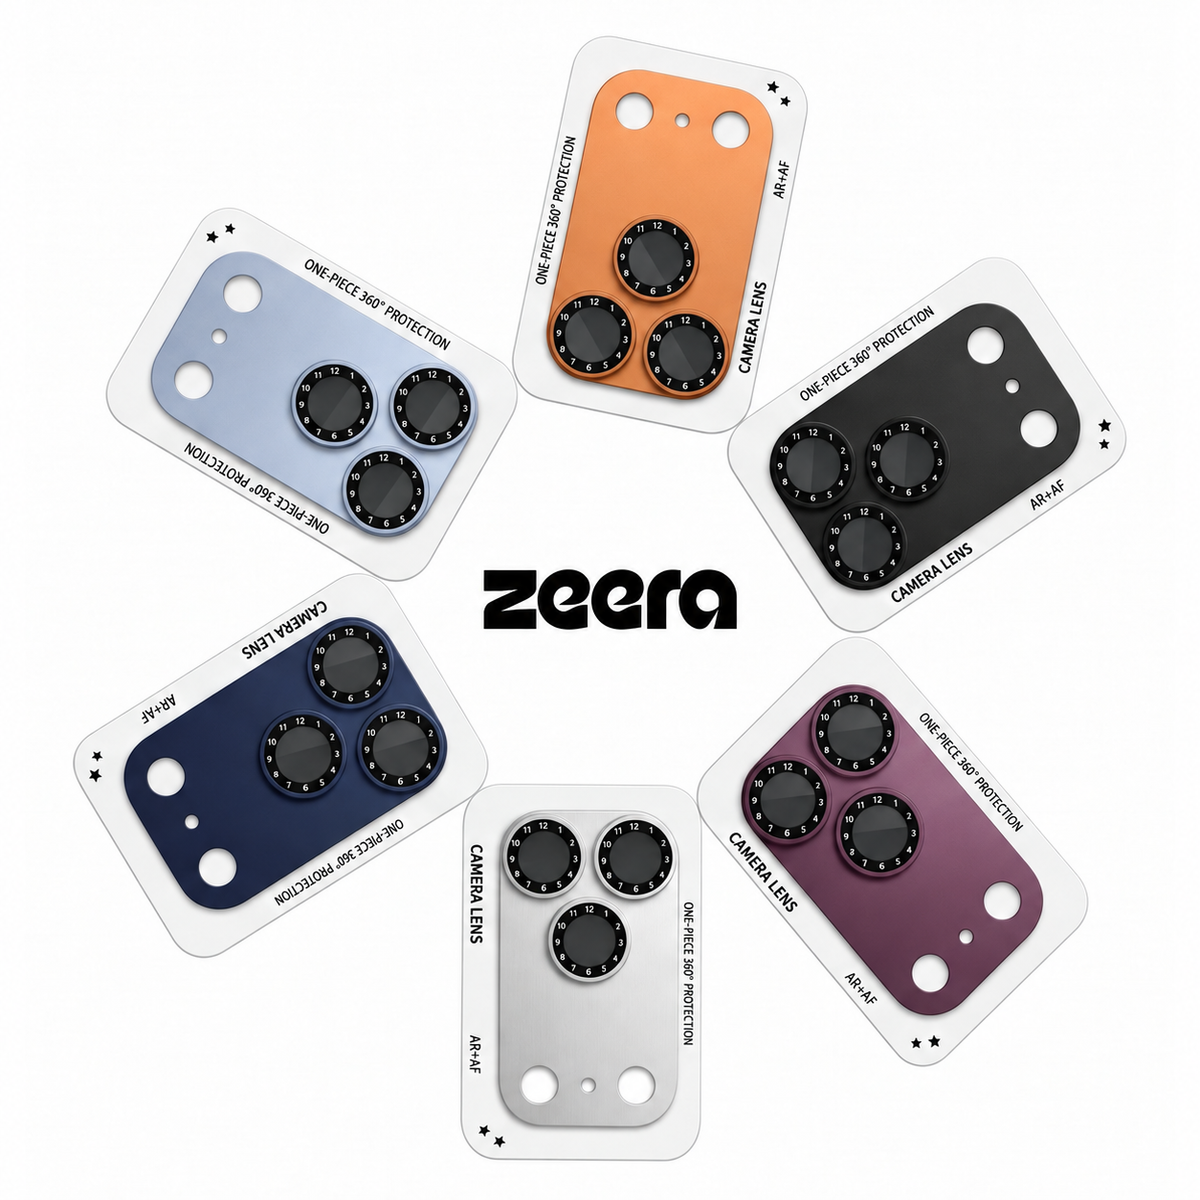
SnapLens Trio combines an aluminum camera protector with three independently rotating 360° CPL filters. Adjust the ring for the active rear camera while watching the preview.
Best fit: frequent daylight photography of glass, water, cars and landscapes where suitable reflections need control.
Know the limitation: it is an integrated CPL system, not an interchangeable ND or mist kit. Rotating to a weaker polarization effect does not make it equivalent to clear, unfiltered glass or remove its light loss.
ZEERA SnapLens Magnetic Filter System: switch effects by scene
The SnapLens Creator Kit uses a CNC metal mounting plate and interchangeable magnetic CPL, ND32, 1/4 Black Mist and UV filters. No dedicated filter case is required; select the correct iPhone model.
Best fit: creators who alternate between reflection control, bright-light video and intentional diffusion, and want to detach the optical filter when it is unnecessary.
What does ND32 actually mean?
ND32 is nominally a five-stop reduction: about 1/32 of the incoming light passes through. The “32” does not mean 32 stops. This is the standard ND rating, not a ZEERA laboratory transmission measurement.
At the same aperture and ISO, an illustrative 1/2000-second exposure becomes approximately 1/60 second. Automatic exposure may instead alter ISO or other settings. A fixed ND32 is not guaranteed to suit every bright scene.
For the magnetic kit, choose CPL for suitable reflections, ND32 when your chosen settings need less light, 1/4 Black Mist for a softer mood, and UV when you want a protective layer. Detach the filter when none of those jobs is needed.
How can I check whether the filter is helping?
1. Make a clean reference photo
Clean the phone’s camera glass. Use one camera, the same framing and the same focus point. Photograph a stationary scene without the optical filter if your setup allows safe removal.
2. Compare the intended effect
Attach one filter and repeat. For CPL, assess the target reflection. For ND, assess exposure and motion at your chosen settings. For mist, assess highlight glow and whether the softness suits the subject.
3. Check the trade-offs at full size
Inspect fine detail, shadow noise, frame corners and bright lights. Repeat a few times so a focus miss or hand movement does not decide the result.
For an everyday automatic-camera comparison, let exposure settle on each shot. To isolate the optical effect, use manual controls and compensate for the filter’s light loss while keeping other settings as consistent as possible.
Keep the filter only when its benefit matters more than its cost in that scene. If both filtered and unfiltered photos look poor, investigate focus, camera cleanliness, movement and lighting before buying another accessory.
FAQ: iPhone 18 Pro Max camera filters
Can a filter fix blurry iPhone photos?
It cannot correct missed focus or subject movement. A CPL may reveal detail hidden by suitable reflections, but that is different from sharpening a blurry capture.
Should I leave a CPL on all the time?
Consider the light loss and your subjects. A detachable CPL is useful when needed; an integrated CPL offers convenience with a continuing optical trade-off. A weak rotation setting is not an off switch.
Why does my ND-filter photo look just as bright?
Automatic exposure may restore brightness by changing shutter speed, ISO or other available controls. ND is most useful when you deliberately manage those settings.
Will a CPL remove reflections from a mirror?
Do not count on it. A mirror’s metallic reflective layer behaves differently from the glare on water or ordinary glass. Change your position, composition or lighting.
Can software replace a physical CPL?
Editing can adjust contrast and color, but cannot reliably recover scene detail that a strong reflection concealed during capture. A CPL can reduce suitable reflections before the image is recorded.
Does an iPhone need UV to take sharper photos?
No. Choose it for the protective role you want, without expecting extra resolution. Keep every optical layer clean and check how it performs in your lighting.
Related reading
- iPhone camera glare: reflections vs lens flare
- Do camera lens protectors affect photo quality?
- Choosing CPL, ND and Black Mist filters
- Practical iPhone Pro photography tips
- Comparing the two ZEERA SnapLens systems
- Understanding iPhone Pro camera controls
Sources and product information
The explanations above apply general optical and exposure principles to iPhone shooting. They are not a claim of new ZEERA laboratory tests. Product configurations follow the linked product pages; no universal image-quality improvement is promised.
- Nikon: ND, CPL, filter quality, cleaning and stacking
- Nikon: polarizer light loss and when to remove one
- Nikon School: polarization angles and wide-angle skies
- HOYA: the ND32 five-stop rating and exposure applications
- Tiffen: general diffusion and highlight-glow principles
- Apple: manual exposure duration and ISO controls
- ZEERA: SnapLens Trio configuration and compatibility
- ZEERA: SnapLens magnetic Creator Kit contents